
Why Is My Air Compressor Not Building Pressure?

An Air Compressor that runs continuously but cannot build pressure is more than an annoyance. It can signal a leak, a worn component, a blocked intake, or a pressure reading you cannot trust. The clues are often small: a faint hiss near a hose fitting, a filter dark with dust, or a gauge needle that barely moves. Start with what you can observe. Do not assume the motor is the problem.

Compressed-air specialist Ron Marshall’s technical guidance supports a practical principle: measure the system and trace air loss before replacing parts. That is a diagnostic reminder, not a substitute for the compressor’s manual or a qualified technician’s assessment. Check the tank drain, fittings, hoses, intake filter, and pressure switch, while following the manufacturer’s safety instructions. Release stored pressure before servicing components. A careful inspection can reveal whether air is escaping or the pump itself is struggling.

This guide will explain common causes, simple checks, and signs that call for professional service. It will also distinguish low pressure from slow recovery, since they point to different faults. And sometimes, the gauge is wrong. That possibility is easy to overlook, especially when the machine sounds normal. Pressure problems do not always have one neat answer; age, maintenance, and operating conditions matter. A few observations can narrow the search, but guessing and replacing parts can waste time and money. Start with evidence, then choose the next step.
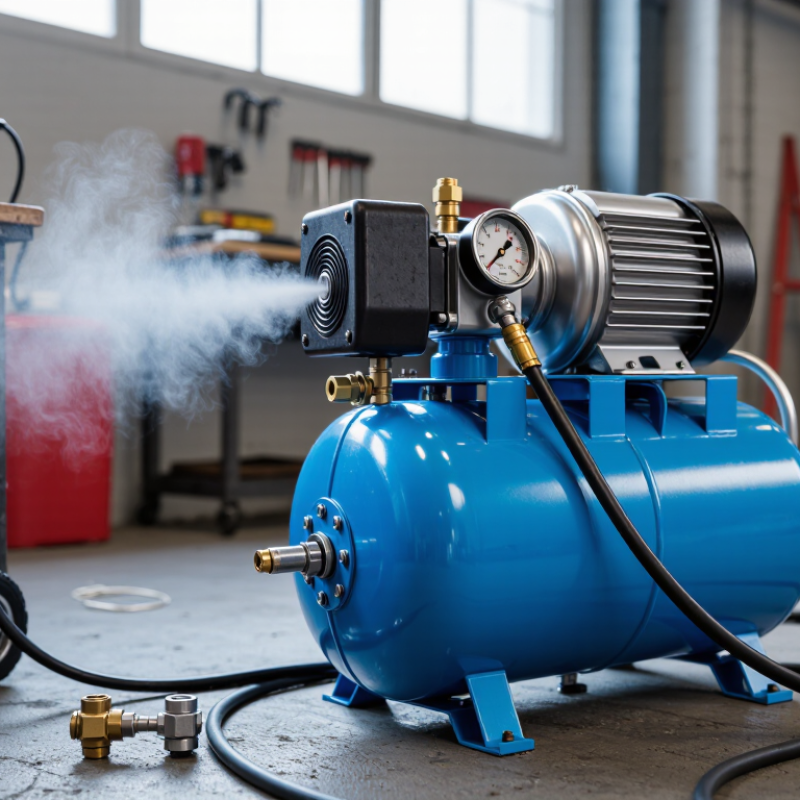
Why Is My Air Compressor Not Building Pressure?

How an Air Compressor Builds and Regulates Pressure

An air compressor builds pressure by drawing in air and squeezing it into a storage tank. In a common piston model, an electric motor turns a crank, moving the piston inside a cylinder. The intake valve admits air on the downstroke. On the upstroke, the piston compresses it and pushes it through a discharge valve. You can often hear the pump cycle, then pause as tank pressure rises.

A check valve helps keep stored air from flowing back into the pump. The pressure switch monitors the tank and starts or stops the motor at set pressure points. Those points are called cut-in and cut-out pressure. Not quite the same thing. The tank gauge shows stored pressure, while a regulator sets the lower pressure delivered to a tool. Turning the regulator knob does not make the tank hold more air.

A separate safety relief valve is designed to release air if pressure becomes excessive. If the motor runs but the tank gauge barely moves, air may be escaping or the pump may not be compressing effectively. A hissing connection is a useful clue, but not a diagnosis by itself. I’ve seen people adjust the regulator while watching the tank gauge; that usually sends them in the wrong direction. Compare both gauges, listen for leaks, and consult the unit’s manual before servicing pressurized parts.

Common Reasons an Air Compressor Fails to Build Pressure

When an air compressor will not build pressure, the gauge is a clue, not a diagnosis. Note how quickly pressure rises and compare it with the unit’s specified cut-out pressure. A running motor with a stalled gauge often points to escaping air or reduced pump output. It is tempting to blame the pump. That can be a costly guess.

Leaks are common. Listen near hose couplings, the regulator, drain valve, and tank fittings; even a faint hiss matters. The U.S. Department of Energy’s Compressed Air Challenge sourcebook reports that leaks can waste 20–30% of compressor output in poorly maintained systems. Soapy water on pressurized joints can reveal bubbles, but keep it away from electrical parts. A drain valve left partly open can also prevent pressure from rising.

If you find no leak, check the intake filter, belt tension, and unloader or check valve, following the manual. A clogged filter restricts airflow; worn valves, rings, or a leaking head gasket can reduce compression. Disconnect power and fully depressurize the tank before opening covers. Gauges can stick, too, so compare readings with a known-good gauge before replacing parts. If pressure stalls below the specified cut-out, avoid using air tools until the fault is identified.

How to Diagnose Pressure-Building Problems Step by Step

When an air compressor will not build pressure, note what the gauge does during a normal run. Does it stay near zero, rise slowly, or stop below its usual cut-out point? Start with the gauge. If possible, compare it with a known-good gauge; a faulty reading can send you chasing the wrong problem. Keep the tank’s rated pressure in mind, and never raise the pressure switch setting to compensate.

Listen for leaks while the compressor is running, then switch it off and unplug it before inspecting fittings. Drain the tank safely, following the manual. A steady hiss around a hose connection or drain valve may explain a slow pressure rise. A soap-and-water solution can reveal small leaks as bubbles. Check the air filter too. A clogged filter can restrict intake and reduce output.

If pressure still stalls, inspect the belt for looseness or damage, but only with power disconnected. Look for a stuck unloader valve or a leaking check valve; these often cause repeated motor cycling or air escaping near the switch. Symptoms overlap, so don’t assume one sound proves the cause. I’ve seen a dirty filter overlooked because a leak seemed more obvious. If the pump overheats, makes unusual knocking sounds, or still cannot reach its normal pressure, stop testing and have a qualified technician inspect it.

Ways to Fix Air Leaks, Valve Faults, and Worn Components

When an air compressor runs but pressure barely rises, check for leaks before replacing parts. Shut it down, isolate power, and release stored pressure before tightening fittings or removing components. Inspect hose joints, the tank drain, and couplings; a thin film of soapy water can reveal bubbles at leak points. Small leaks are easy to miss. A pressure drop while the machine is off can also point to a leaking check valve.

Valve faults and worn internals need different checks. A damaged intake or reed valve may cause slow pressure build-up, while a faulty check valve can let air escape toward the pump. Worn piston rings or a scored cylinder may cause persistent low output, sometimes with unusual oil carryover. The U.S. Department of Energy’s Improving Compressed Air System Performance report notes that leaks can waste 20–30% of compressor output. Confirm readings with a reliable gauge, and have a qualified technician inspect the pump head if basic checks do not explain the loss. A quick fix can mask a deeper fault.

Tips: Listen near fittings for a hiss, then test one section at a time. Never loosen a pressurized connection. Record tank pressure and build-up time after repairs; results can vary with tank size and tool demand.

When to Repair or Replace an Air Compressor

When an air compressor will not build pressure, find the cause before pricing a replacement. Listen for a steady hiss near fittings, hoses, and the drain valve. Check the intake filter, pressure switch, and belt, if fitted. A dirty filter or leaking connection may be inexpensive to fix. Isolate power and release stored air before inspecting internal parts. Do not open a pressurized tank. The U.S. Department of Energy’s Improving Compressed Air System Performance guide reports that leaks can waste 20–30% of compressor output. That matters. A leak can mimic a failing pump and distort your repair decision.

Repair is often sensible when the tank is sound and the fault is limited to a valve, gasket, switch, or other replaceable part. Replacement deserves consideration when pressure remains low after leak and control checks, the pump needs major work, or the tank shows corrosion or damage. Compare a written repair estimate with the cost of a suitable replacement, including installation and expected energy use. DOE notes that compressed air can represent about 10% of electricity use in manufacturing, so efficiency belongs in that comparison. That percentage is not a universal estimate for every shop. The honest answer may be less tidy: a technician’s pressure test and a tank inspection can change the decision.

Why Is My Air Compressor Not Building Pressure? — When to Repair or Replace an Air Compressor

Symptom Possible cause What to check Repair or replace guidance
Pressure rises very slowly or stops below the normal cut-out pressure. Air leak at a hose, fitting, drain valve, regulator, or tank connection. With the compressor off and the tank pressurized, listen for escaping air. Apply soapy water to accessible joints; bubbles can reveal a leak. Often repairable by tightening or replacing a fitting, hose, or valve. Do not weld or patch a compressed-air tank.
The motor runs, but little or no air reaches the tank. Faulty tank check valve or an unloader valve that is stuck open. Listen for continuous air escaping near the pressure switch or check valve. Inspect only after disconnecting power and safely releasing pressure. These valves are commonly serviceable or replaceable. Use the correct part and follow the equipment instructions.
Pressure builds slowly, and airflow from the pump seems weak. Dirty or blocked intake filter, restricted intake, or damaged intake valve. Check that the intake opening is clear and inspect the filter for dust, oil, or damage. Clean or replace a serviceable filter first. Persistent poor output may require valve or pump-head repair.
The pump runs unusually hot or takes much longer than usual to fill the tank. Worn piston rings, a damaged cylinder, or leaking reed/plate valves. Compare fill time with the manual’s specifications and check for abnormal noise, excess oil carryover, or poor performance. A rebuild may be practical if parts are available and the cylinder and crankshaft are in good condition. Consider replacement if major components are badly worn or repair costs approach the price of a suitable new unit.
A belt-driven compressor’s motor runs, but the pump turns slowly or not at all. Loose, worn, or broken drive belt; misaligned pulleys; or a slipping coupling. Disconnect power before inspecting the drive. Check belt condition and tension against the manufacturer’s instructions. A belt or alignment correction is usually a straightforward repair. Replace the compressor only if the pump or motor also has substantial damage.
The compressor stops before reaching its usual pressure, or the motor repeatedly trips. Overheating, a failing capacitor or motor, incorrect supply voltage, or a pressure-switch problem. Check ventilation and the rated electrical supply. Note whether the breaker trips, the motor hums, or the pressure switch cuts out unexpectedly. Have electrical faults assessed by a qualified technician. Repair can make sense for a serviceable motor; a severely damaged or obsolete motor may make replacement more practical.
Pressure reaches a level but drops while the compressor is off. Air leak, leaking drain, or a tank check valve that does not seal. Close the outlet valve and monitor the tank gauge. A falling reading suggests leakage, but gauge accuracy and temperature changes can affect readings. Locate and repair the leak. If the tank itself is corroded, cracked, bulging, or leaking, stop using the compressor and replace the tank or unit as appropriate.
The unit is old, needs frequent repairs, or cannot meet the air demand of the tools. Accumulated wear, inadequate compressor capacity, or a damaged pressure vessel. Compare the compressor’s delivered airflow (CFM at the required pressure) with the tool’s stated requirement. Inspect the tank for corrosion and damage. Repair is generally more attractive when the fault is isolated and parts are available. Replacement is often the safer, more economical choice for a damaged tank, repeated major failures, or insufficient capacity.

Safety: Disconnect electrical power and fully release tank pressure before servicing. Never exceed the tank’s rated pressure or use a compressor with a damaged pressure vessel. Consult the owner’s manual or a qualified technician if the cause is uncertain.

Back To Top