Why Do Mechanical Seals Fail?

Why Do Mechanical Seals Fail?

Mechanical Seals protect pumps, mixers, compressors, and other rotating equipment from leakage. Their failure rarely begins with one dramatic event. It often starts quietly: a dry-running moment, a scratched face, a blocked flush line, or a shaft that vibrates beyond its design limit. The U.S. Department of Energy reports that pumping systems can represent a significant share of industrial electricity use, making seal reliability both a safety concern and an energy issue. A small leak can also become a visible maintenance problem within hours.

Industry guidance adds useful context. API Standard 682 emphasizes correct seal selection, controlled installation, flushing plans, and operating conditions. These details matter because Mechanical Seals do not work alone. They depend on clean fluid, stable pressure, accurate alignment, and suitable materials. According to Grand View Research, demand for mechanical seals continues to grow across chemical processing, oil and gas, water treatment, and power generation. More equipment means more opportunities for failure.

Rotating-equipment authority Heinz P. Bloch offers a practical warning: “The best seal is the one that does not leak.” That sounds simple. It is not always simple in the field. A technician may replace the seal while ignoring pipe strain or poor lubrication. The new seal then fails again. This article examines the real causes behind those failures, including installation errors, heat, vibration, pressure changes, contamination, and incorrect design assumptions. Some failures remain difficult to explain. That uncertainty deserves honest investigation, not convenient blame.

Why Do Mechanical Seals Fail?

Mechanical Seal Function and Common Failure Patterns

Why Do Mechanical Seals Fail? Mechanical Seal Function and Common Failure Patterns

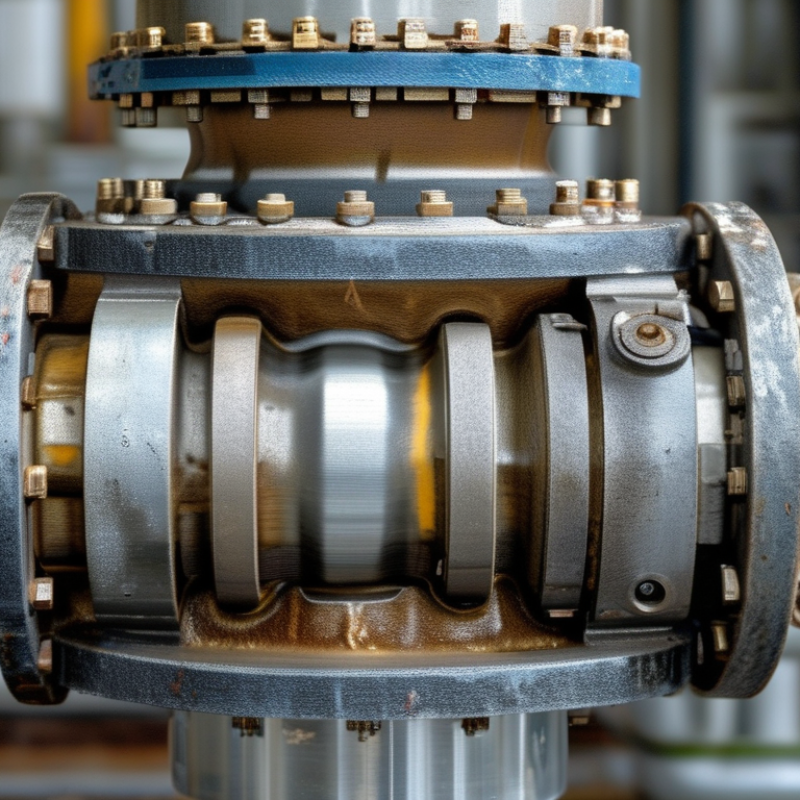
A mechanical seal prevents process fluid from escaping where a rotating shaft enters a pump casing. Two precisely lapped faces maintain a narrow lubricating film. Springs, secondary seals, and the stationary seat support that contact. Small changes matter. Dry running can overheat the faces within minutes. Misalignment can create uneven wear, visible as a polished arc on one side.

The U.S. Department of Energy reports that pumping systems may consume about 25% of industrial facility electricity. This makes seal reliability important, because leakage often signals wider hydraulic or maintenance problems.

Common failure patterns include thermal cracking, abrasive grooves, elastomer swelling, and spring blockage. Excessive vibration usually points toward cavitation, imbalance, or poor installation rather than a seal-only defect. The European Sealing Association’s technical guidance stresses correct material selection and operating limits for sealing systems.

Field inspections also show that contamination during assembly remains a practical cause of early failure. A single grain can matter. My first diagnosis is not always right. That is the uncomfortable part.

Operators should compare face photographs, flush-plan conditions, shaft runout, pressure, temperature, and startup records. API 682 provides recognized design and testing guidance for centrifugal pump sealing systems, but compliance cannot correct poor operation. A seal may fail because the equipment environment was misunderstood, not because the component was inherently weak.

How Mechanical Seal Damage Develops Step by Step

Why Do Mechanical Seals Fail?

How Mechanical Seal Damage Develops Step by Step

Mechanical seal damage usually develops quietly. The first stage is often poor installation. Uneven tightening, dirty faces, or incorrect compression can create a small leak. That leak may look harmless, but it reduces lubrication between the faces. Heat then builds at the contact point.

The second stage is surface damage. Dry running can cause blistering, cracking, or dark thermal marks. Solids in the fluid may score the seal faces like fine sandpaper. Shaft movement makes the problem worse. According to API 682, seal selection must consider pressure, temperature, fluid properties, and operating conditions. A seal can be technically suitable yet fail when the pump operates outside its design window.

The U.S. Department of Energy reports that pumping systems may consume 25–50% of industrial facility electricity. This matters because unstable operation often increases both energy use and seal stress. A 2022 reliability review by the Hydraulic Institute also emphasizes alignment, lubrication, and condition monitoring as practical controls. The uncomfortable lesson is simple: replacing the seal alone may not solve the failure.

Tips: Check alignment before installation. Keep seal faces clean. Record leakage, vibration, temperature, and pressure trends. Inspect the removed seal, not just the damaged faces. Sometimes the real cause is upstream.

Operating Conditions That Accelerate Seal Failure

Why Do Mechanical Seals Fail?

Operating Conditions That Accelerate Seal Failure

Mechanical seals rarely fail without warning. In field inspections, excessive heat is often the first visible clue. Dry running can damage faces within seconds, especially during startup or loss of process fluid. High shaft speed increases friction and heat when lubrication is inadequate. Pressure changes can also distort sealing faces and overload secondary components. Small errors grow quickly.

Abrasive particles create another serious problem. Solids can scratch faces, block springs, and wear elastomers. Chemical incompatibility may cause swelling, hardening, or cracking. Frequent temperature cycling is easily underestimated. Repeated expansion and contraction can loosen components and weaken the seal arrangement. Misalignment, vibration, and pipe strain add mechanical stress. I have seen apparently correct installations fail because the connected piping pulled the pump casing out of alignment. That detail is easy to miss.

Tips: Check fluid level, temperature, pressure, speed, and vibration during real operation. Do not rely only on startup readings. Confirm material compatibility with the actual process fluid, including cleaning chemicals. Inspect faces for scoring and heat marks. Record leakage changes over time. A simple trend can reveal trouble before a shutdown. If conditions vary sharply, review the seal design again. Sometimes the original selection was reasonable, but the process changed. That possibility deserves honest attention.

Methods for Identifying the Root Cause of Failure

Mechanical seals rarely fail without evidence. The evidence is often discarded during urgent repairs. In field investigations, I preserve the seal faces, elastomers, springs, and deposits before cleaning anything. A brown, glazed face may indicate overheating. A scratched face may indicate solids or poor installation. The pattern matters more than the broken part.

The U.S. Department of Energy reports that pumping systems can represent about 27% of industrial electricity use. It also estimates that system improvements may reduce pumping energy by 20–50%. These figures make root-cause work financially important, not merely corrective maintenance. Start with operating records: pressure, temperature, speed, vibration, and startup conditions. Compare them with the design limits in API 682. Check shaft runout, sleeve condition, gland alignment, and flush flow. A blocked flush line can create dry running within minutes. Chemical incompatibility may swell an elastomer before leakage becomes visible.

Do not rely on photographs alone. Inspect both faces under magnification, measure flatness, and identify deposits through laboratory analysis when necessary. Review installation tools and torque practices. Interview the operator who heard the first change. That detail is often missing from reports. We sometimes blame the seal too quickly. A better investigation may reveal cavitation, pipe strain, unstable process conditions, or a forgotten valve position. The honest record should also include uncertainty, because a confident wrong diagnosis can repeat the failure.

Why Do Mechanical Seals Fail? — Methods for Identifying the Root Cause of Failure
Failure Mode Typical Observable Symptoms Common Root Causes Evidence to Collect Recommended Diagnostic Method Confirmation Criteria Corrective Action Priority
Dry running or inadequate lubrication Rapid leakage, discolored faces, heat checking, cracked carbon, or a sharp burnt odor. Loss of liquid at the seal chamber, blocked flush path, incorrect startup sequence, or operation below the required liquid level. Startup and trip history, seal-chamber level, flush-flow records, face color, and carbon-face condition. Verify flush flow and pressure; inspect the seal faces and review operating conditions during startup and shutdown. Evidence of thermal damage combined with documented loss of liquid or insufficient flush during the failure event. Prevent dry operation, improve instrumentation, clear blocked lines, revise startup procedures, and select a seal arrangement suitable for the service. High
Excessive heat generation High leakage rate, face distortion, thermal cracks, elastomer hardening, or repeated failures after short operating periods. Excessive closing force, inadequate cooling, high sliding speed, incorrect face combination, or excessive friction caused by contamination. Process temperature, seal-face temperature, shaft speed, pressure, flush temperature, and face-wear pattern. Compare actual speed, pressure, and temperature with the seal design limits; check cooling and calculate the operating duty. Thermal damage is consistent with the calculated heat load and cooling capacity. Restore cooling or flush capacity, correct operating conditions, reduce friction, and review the face materials and balance ratio. High
Misalignment or shaft runout Uneven face wear, localized wear bands, fretting, fluctuating leakage, or visible movement of the rotating assembly. Pipe strain, worn bearings, bent shaft, incorrect assembly, soft foot, or excessive shaft runout. Shaft runout, end play, bearing condition, coupling alignment, pipe-support condition, and seal-face wear pattern. Measure shaft runout with a dial indicator, check alignment, inspect bearings, and verify pipe strain after installation. Measured movement exceeds the seal or equipment tolerance and matches the observed non-uniform wear. Correct alignment, remove pipe strain, repair bearings or shaft defects, and verify equipment tolerances before reinstalling the seal. High
Vibration or unstable operation Intermittent leakage, face opening, noisy operation, fretting marks, or accelerated wear of secondary seals. Hydraulic instability, cavitation, resonance, unbalanced rotating parts, bearing defects, or operation away from the pump's stable region. Vibration spectrum, operating point, suction conditions, bearing data, and the timing of leakage relative to speed or load changes. Perform vibration analysis, check for cavitation, compare operation with the pump performance curve, and inspect rotating components. Vibration or hydraulic instability occurs at the same operating conditions as the leakage or face-opening event. Correct the hydraulic operating point, remove the vibration source, repair rotating components, and improve support or piping conditions. High
Chemical attack or elastomer incompatibility Swollen, cracked, softened, hardened, or permanently deformed elastomers; corrosion or discoloration of seal components. Incorrect material selection, unexpected process chemistry, concentration changes, incompatible cleaning fluid, or excessive temperature. Process composition, concentration, pH, temperature history, cleaning chemicals, and condition of elastomers and metal parts. Compare chemical compatibility data with actual service conditions and perform laboratory examination of affected materials. Material deterioration is consistent with exposure to the identified chemical and operating temperature. Select compatible elastomers, faces, and metal parts; control chemical concentration and verify cleaning procedures. High
Abrasive or particulate contamination Grooves across seal faces, rapid wear, scratched surfaces, leakage that increases progressively, or blocked springs. Solids in the process fluid, inadequate filtration, product crystallization, poor flush quality, or contamination introduced during assembly. Particle type and size, filter condition, flush-fluid cleanliness, face scratches, spring condition, and equipment cleanliness. Inspect faces microscopically, analyze deposits, check filtration, and verify flush pressure and flow direction. Wear tracks and deposits contain particles capable of producing the observed abrasion or blockage. Improve filtration or flushing, prevent crystallization, clean components thoroughly, and use faces or designs suited to solids service. High
Pressure reversal or incorrect pressure balance Unstable leakage, face opening, extrusion of secondary seals, or damage that changes with pressure fluctuations. Incorrect seal orientation, pressure exceeding the design limit, reverse pressurization, blocked pressure-relief paths, or incorrect balance ratio. Pressure at the seal chamber, suction and discharge pressures, transient events, seal orientation, and installation records. Trend pressure during startup, shutdown, and upset conditions; verify the seal arrangement and calculate pressure loading. Recorded pressure conditions exceed the design envelope or create a direction of loading not supported by the seal design. Correct installation orientation, control pressure transients, restore relief paths, and select a pressure-rated arrangement. High
Improper installation or assembly damage Leakage immediately after installation, chipped faces, cut O-rings, loose components, or incorrect spring compression. Dirty assembly area, damaged handling surfaces, incorrect dimensions, missing parts, over-tightened fasteners, or incorrect setting length. Installation records, component measurements, gasket and O-ring condition, setting dimensions, and photographs before operation. Compare assembly dimensions with the equipment drawing, inspect components under magnification, and verify installation sequence. The defect is present before significant operating wear and corresponds to an assembly or handling error. Standardize installation procedures, use clean tools and work areas, train technicians, and verify critical dimensions before startup. Medium
Secondary-seal sticking, extrusion, or loss of movement Leakage that changes with temperature or pressure, localized wear, torn elastomers, or evidence that the seal face cannot follow axial movement. Elastomer swelling, hardened deposits, excessive clearance, pressure extrusion, corrosion, or incorrect secondary-seal material. Elastomer hardness, surface condition, groove dimensions, pressure and temperature history, and deposits on sliding surfaces. Inspect grooves and sliding surfaces, measure clearances, test elastomer condition, and compare material limits with service data. Restricted movement or extrusion damage explains the loss of face contact under the recorded operating conditions. Clean or redesign grooves, control clearances, select a compatible elastomer, and limit pressure and temperature excursions. Medium
Corrosion or galvanic attack Pitting, component thinning, spring failure, surface roughness, or leakage that worsens after extended service. Incompatible metallurgy, aggressive chemistry, stagnant fluid, oxygen ingress, or galvanic coupling between dissimilar metals. Corrosion morphology, process chemistry, metal composition, electrical contact between metals, and location of attack. Conduct visual and microscopic inspection, identify materials, analyze deposits, and review corrosion-control conditions. The corrosion pattern and material combination are consistent with the process environment or galvanic mechanism. Use compatible materials, isolate dissimilar metals where appropriate, control chemistry, and eliminate stagnant or contaminated zones. Medium
Normal wear or end-of-life degradation Gradually increasing leakage, predictable face wear, reduced spring force, or performance decline after long service. Expected wear from operating hours, fluid lubricity, sliding speed, pressure, temperature, or maintenance interval. Operating hours, leakage trend, face-width measurements, spring condition, and maintenance history. Compare wear measurements with historical data and expected service life; rule out thermal, chemical, and mechanical damage. Wear is uniform, progressive, and consistent with service duration without evidence of a sudden abnormal event. Set condition-based replacement criteria, monitor leakage, and review the maintenance interval using actual service data. Low
Incorrect operating conditions or process upset Failure follows a change in speed, pressure, temperature, fluid composition, flow rate, or startup and shutdown frequency. Operation outside the design envelope, frequent cycling, pump cavitation, blocked discharge, or unplanned process changes. Time-synchronized process trends, alarm history, operator logs, seal leakage records, and maintenance timestamps. Perform a timeline analysis linking process changes to leakage, temperature, vibration, and pressure behavior. The failure begins after a specific operating excursion and the excursion is technically capable of damaging the seal. Control the process envelope, add alarms or interlocks, revise operating procedures, and reassess seal selection for actual duty. High

Diagnostic principle: preserve the failed seal, document the operating history, inspect all components before cleaning, and compare physical evidence with actual pressure, temperature, speed, vibration, chemistry, and flush conditions.

Design, Installation, and Maintenance Practices for Prevention

Why Do Mechanical Seals Fail?

Design, Installation, and Maintenance Practices for Prevention

Mechanical seals rarely fail without warning. Their problems often begin with design choices that ignore operating conditions. Pressure, temperature, shaft speed, fluid chemistry, and vibration must be reviewed together. A seal should match the equipment, not merely fit its dimensions.

Specify suitable face materials and elastomers for the process fluid. Consider abrasive particles, crystallization, and sudden temperature changes. Shaft movement also matters. Excessive runout can damage seal faces within hours. Clear flushing or cooling plans help control heat. These details are easy to overlook.

Installation demands patience. Inspect the shaft, sleeve, and seal faces before assembly. Keep every surface clean and free from fingerprints, dust, and metal fragments. Never force a seal into position. Use the correct tools and follow measured compression settings. Alignment matters. A small error can create uneven contact and leakage. Avoid dry running during startup. Short operation can still cause damage.

Maintenance should track leakage, temperature, vibration, and pressure trends. A few drops may indicate early face wear, while sudden leakage requires immediate investigation. Record findings after every inspection. This creates useful evidence instead of relying on memory. Check flush lines for blockage and confirm that valves remain correctly positioned. Do not tighten components blindly; excessive compression can worsen the problem. In field work, the smallest overlooked detail often becomes the expensive failure. No checklist is perfect. Review it after each incident.

Article Source:

Back To Top